myWerkzeug.de › CNC.myWerkzeug.de › Templates › Technology and experiments
CNC template · Technology and experiments
Double pendulum with ball bearings

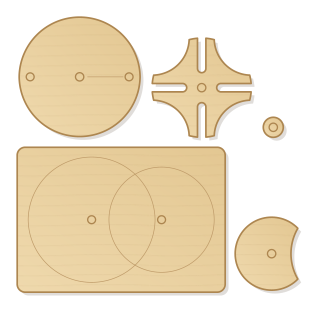
Two coupled pendulum arms on ball bearings: small differences at release lead to completely different paths, a vivid example of chaos. Wall board, arms and weight; arm lengths adjustable.
- Size
- 520 × 382 mm, 6 mm thick
- Material
- Plywood
- Difficulty
- Intermediate
- Milling time
- approx. 19 min
- Bits
- V-bit 60°, End mill Ø 3.175 mm
- Customise
- Size, text and details adjustable with sliders
- With a laser
- diode laser from about 10 W (cuts 6 mm)
Try it without an account · carve with Chrome or Edge · no installation
Build instructions
Materials and accessories
| Qty | Part |
|---|---|
| 2 | Ball bearing 608 (8 × 22 × 7 mm) with M8 screw and nut |
| 2 | Wood screws 4 × 35 mm with wall plugs |
Also: sandpaper (grit 120 and 240), a utility knife or fine saw and, for joints, a rubber mallet.
Carving and finishing
- Clamp the workpiece flat on the spoilboard or secure it with double-sided tape, and set the origin as shown in the carving assistant.
- Mill bearing seats and screw holes, engrave the centre line, then cut out wall board and both arms. The bearing seats are designed as a press fit.
- Free the parts at the holding tabs with a utility knife or fine saw and sand the tab remains flush.
- Before gluing, dry-fit everything. If a joint is too tight, increase the clearance by 0.05 mm and carve the part again; if it wobbles, reduce it.
Assembly and final touches
- Press a 608 ball bearing into the top of each arm. Push the M8 screw through the board, tighten it with a nut and put the upper arm on the screw with washers.
- Mount the lower arm the same way on an M8 screw in the lower hole of the upper arm. Both arms must swing on freely for a long time.
- Screw the board vertically to the wall, lift the arm and let go. Start twice almost the same way: after a few swings the paths are completely different.
How to carve this template
- OpenOpen the template in the app and adjust size and text if you like.
- CheckLook at it in 3D, check run time and warnings.
- Set upThe carve wizard guides you through material, clamping, bit and zero point.
- CarvePress start; the app drives your Grbl router directly over USB.