myWerkzeug.de › CNC.myWerkzeug.de › Templates › Technology and experiments
CNC template · Technology and experiments
Savonius wind turbine
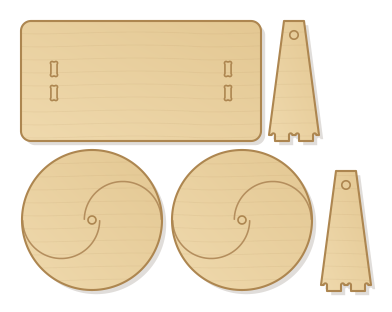
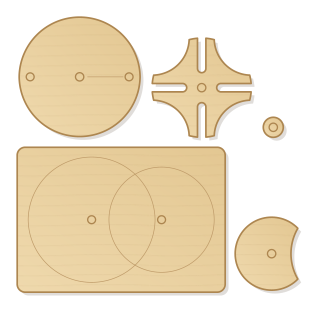
Vertical-axis wind rotor after Savonius: two end discs with milled S-grooves hold blades of thin plastic or aluminium sheet, a tenoned stand carries the axle. Turns in any wind direction.
- Size
- 366 × 286 mm, 6 mm thick
- Material
- Plywood
- Difficulty
- Intermediate
- Milling time
- approx. 31 min
- Bits
- End mill Ø 1 mm, End mill Ø 3.175 mm
- Customise
- Size, text and details adjustable with sliders
- With a laser
- diode laser from about 10 W (cuts 6 mm)
Try it without an account · carve with Chrome or Edge · no installation
Build instructions
Materials and accessories
| Qty | Part |
|---|---|
| 1 | Thin plastic or aluminium sheet (PET bottle, 0.5 to 1 mm) |
| 1 | Beech dowel rod 8 mm |
| 1 | Wood glue (water-resistant D3) |
Also: sandpaper (grit 120 and 240), a utility knife or fine saw and, for joints, a rubber mallet.
Carving and finishing
- Clamp the workpiece flat on the spoilboard or secure it with double-sided tape, and set the origin as shown in the carving assistant.
- Mill the S-grooves 2 mm deep with the 1 mm end mill, drill axle holes and mortises, then cut out discs, base and uprights.
- Free the parts at the holding tabs with a utility knife or fine saw and sand the tab remains flush.
- Before gluing, dry-fit everything. If a joint is too tight, increase the clearance by 0.05 mm and carve the part again; if it wobbles, reduce it.
Assembly and final touches
- Cut two blades the height of the rotor from a PET bottle or thin aluminium sheet, bend them into half shells and glue them into the grooves of both discs.
- Push the dowel tightly through the centre holes of the discs, glue the uprights into the base and mount the rotor between them.
- Put it in front of a fan or in the wind. Experiment: how does the speed change when the blades overlap more or less?
How to carve this template
- OpenOpen the template in the app and adjust size and text if you like.
- CheckLook at it in 3D, check run time and warnings.
- Set upThe carve wizard guides you through material, clamping, bit and zero point.
- CarvePress start; the app drives your Grbl router directly over USB.